Beer foam is not only a necessity as far as appearance is concerned, but also paramount to the whole experience that is beer. It is something so important to me that I designed my logo around it:

Now I am not talking about foam as it relates to a beer that is over carbonated or poured improperly. I am talking about a foam that looks like whipped cream, with no carbonation bubbles screaming towards the surface, as it displays it’s masterfully crafted headpiece that sticks around to the last sip.
I am here today to tell you how I create my signature foam.
Lets first reference the holy brewing bible: Kunze – “Technology of Brewing and Malting” . Kunze has this to say:
7.2.2 Beer foam
The foam of the beer is a parameter which is evaluated very differently in different countries. Whilst in Germany and most European countries great value is attached to a large, stable head of foam, in England, for example, no importance is placed on foam. This is emphasized by the glass being filled to the brim, and not only in the case of beer, whereas in other countries the glass is only intended to be filled to the calibration line to leave sufficient room for the foam. For the evaluation of good foam, its volume and stability are of interest.
Foam formation
Foam occurs on dispensing the beer as a result of the formation of C02 bubbles released by the reduction in pressure. The C02 bubbles occur preferably at condensation points (cracks, adherent particles) in the glass and collect surface active materials as they rise. These surface active substances have a low surface tension but a high hydrophobicity (water repellent property); this means that within limits they can increase their surface area and also, after the bubbles have risen, they form an elastic skin around the gas bubble. The greater the amount of dissolved C02, the more foam is formed. But foam formation is not the same as foam stability. Foam is only stable in the presence of these surface active substances. No stable foam can be formed in a glass of
mineral water since there are none of these substances present there. Thus one must always distinguish between foam formation and foam stability. It is the stability which is most important.
Foam Collapse
Foam begins to collapse as soon as it is formed, but the rate of collapse is very variable. Collapse begins with the bursting and flowing back of the skins of the gas bubbles, as a result of which evaporation processes are encouraged and the foam becomes more solidified in the upper region. This makes it possible to dispense more beer into the glass after a relatively short time (after about a minute) so that the solidified foam is pushed up to form a foam crown above the glass. The further solidification of the foam can be recognised by the formation of foam rings reduced on the wall of the glass each time a drink is taken.
Factors affecting foam stability
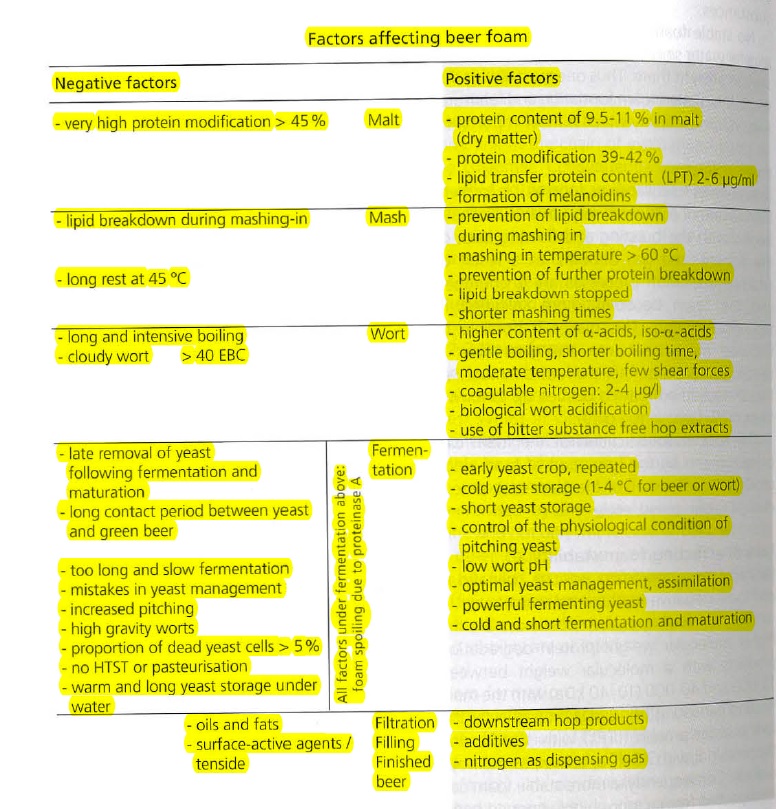
Basically there are foam positive (beneficial) and foam negative (detrimental) substances. The main foam positive substances are the higher molecular weight protein degradation products with a molecular weight between 10 000 and 40 000 (10-40 kDa) with the main fraction consisting of 40 kDa, in particular the lipid transfer protein (LTP1) with 10 kDa and the protein Z with 40 kDa, as well as the hop-a-acids. Consequently, a more stable foam can be expected from a more highly hopped beer. On the other hand, the main foam negative substances are alcohols, part particularly the higher ones, and several fermentation by-products and also anthocyanogens and a higher concentration of amino acids. During lagering and in beer which is not heat treated the LPT1 is increasingly broken down by the yeast proteinase A, which leads to a decrease in foam stability (261 ). By means of heat treatment of the beer (HTST, pasteurization at at least 30 PU) the yeast proteinase A is inactivated. Of the large quantity of factors which can affect the foam, a number of these are summarized in Fig. 7.1 a.
From an analytical point of view, the factors affecting foam are (344):
Malt: protein modification 39-43 %
Mashing: mashing in temperature through short mashing method 60 °c
Wort:
coagulable nitrogen 20-40 mg/I
MgS04 precipitable
nitrogen 130-180 mg/I
FAN 220-250 mg/I
a -acids 1-3 mg/I
iso-a-acids 10-40 mg/ I
zinc 0.15 -0.30 mg/I
ICP > 6.0
methylene blue below 5 %
surface tension 40-44 mN/m
LTP1 2-6 μg/ml
protein Z 100-250 μg/ml
proteinase A < 50 U * 10-5/ml
medium chained fatty acids < 8 mg/I
So what does this mean for homebrewers? Here is what I do:
Malt selection
Any malt we buy, and do not malt our self, is going to be sufficiently modified, so we need to make sure to not over mash it. Malts with melanoidins (longer kilned darker malts) are going to also be more foam positive as well, so keep that in mind. Also never use carapils/carafoam as it is actually very foam negative.
Hop selection
More hops, better potential for foam, generally speaking.
Mashing
It’s no secret I am a fan of recirculating mash systems (direct/herms preferred). They just have so many benefits, namely step mashing and wort clarity. Both of which are going to help us greatly here. We all know by now cloudy wort can lead to accelerated staling, and now we know it can lead to poor head retention as well. The alpha step of a step mesh is probably going to be your best bang for the buck here as far as foam is concerned. The issue, however, is this: the majority of folks who are step mashing are using too low of an alpha step to get the glycoproteins they really need to help them ( looking directly at you 156 rest guys!). I rest for 30 minutes at 73 °C (163-164 °F). However, the mash tun is not our friend so we need to get in, and get out, as soon as possible. Many bad things happen here from oxidation to poor foam, so only mash for as long as you have too. Do not extend the mash without a good reason. Beta enzymes are almost fully denatured within 40 minutes so there is no need to extend the duration unless you have a damn good reason.
Lastly, Sauergut is not only important for controlling mash pH. I add grain to my Sauergut in the reactor and it is fantastic for extracting zinc and other trace minerals from it that are not only desirable from a yeast health perspective, but also from a foam quality persepctive! So to reiterate: Proper pH, step mash with the proper alpha step and timing, Clear wort. Do not short change yourself here.
Boiling
Boiling is not for just adding hops (and foam positive alpa acids). Many bad things can still happen in the boil kettle. Our recommendations are to boil soft to help with with the majority of them, but now we will touch on some others: DMS and Coaguable nitrogen. Boiling too hard will drive coagulable nitrogen out of the wort which is a problem since it’s very foam positive. Conversely even a little bit of DMS is very foam negative. A higher starting boil pH (5.4) will reduce DMS nearly 2x as fast. Soft boil, but get rid of DMS.
Fermentation
I pitch large amounts of healthy yeast and ferment cold. It’s really as simple as that. Give the yeast a happy home with a nice wort full of nutrients and oxygen and they will make your life much easier. Don’t forget to drop that boil pH below 5.2 before yeast is added. Good, healthy, and quick fermentation.
Packaging
We all know the packaging issues, but spunding not only helps us with oxidation mitigation, it actually helps us with foam. Yeast under pressure excrete glycerin, another very foam positive helper for us. Spunding is king, adding sugar is second, force carbonation is bad!
I am not going to sit here and tell you that it’s all just as simple as what is stated above because it’s really not. Beer is the sum of all its parts and it takes a long time to get all those parts in harmony. Although I do hope I shed some light on the techniques I use to produce my signature foam. Of course what would this post be with out foam shots!
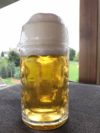
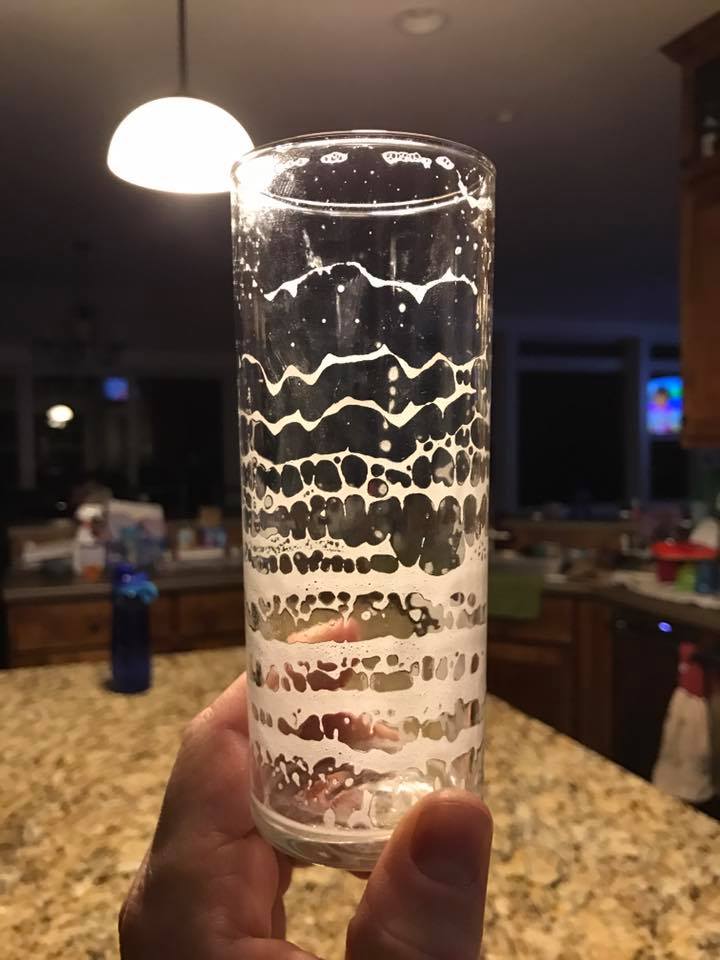
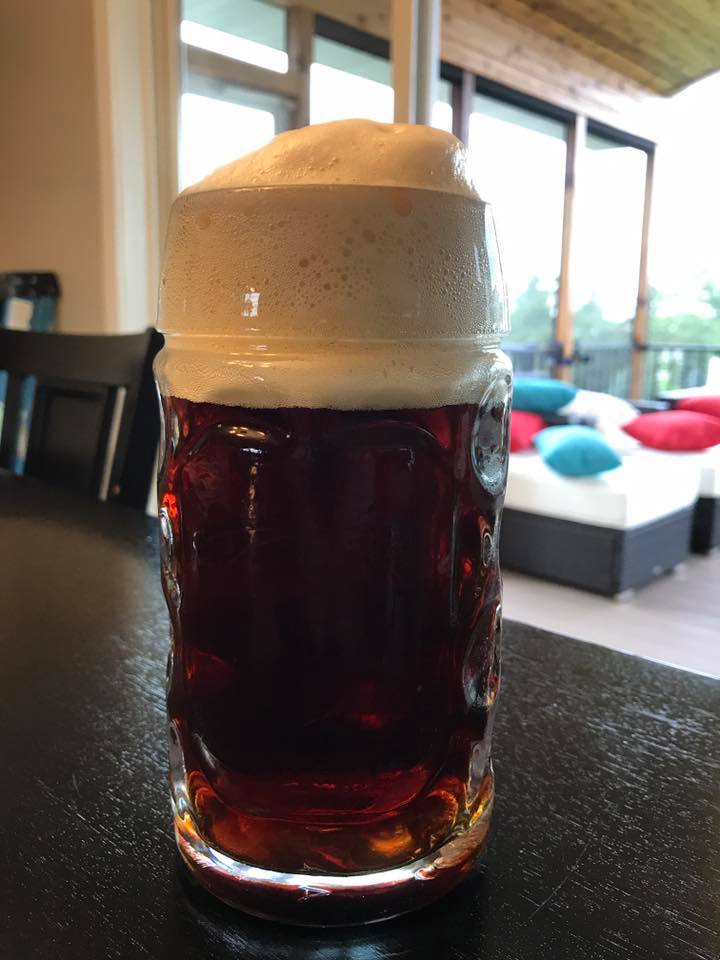
This is an example of foam and lacing. This is a kellerbier:
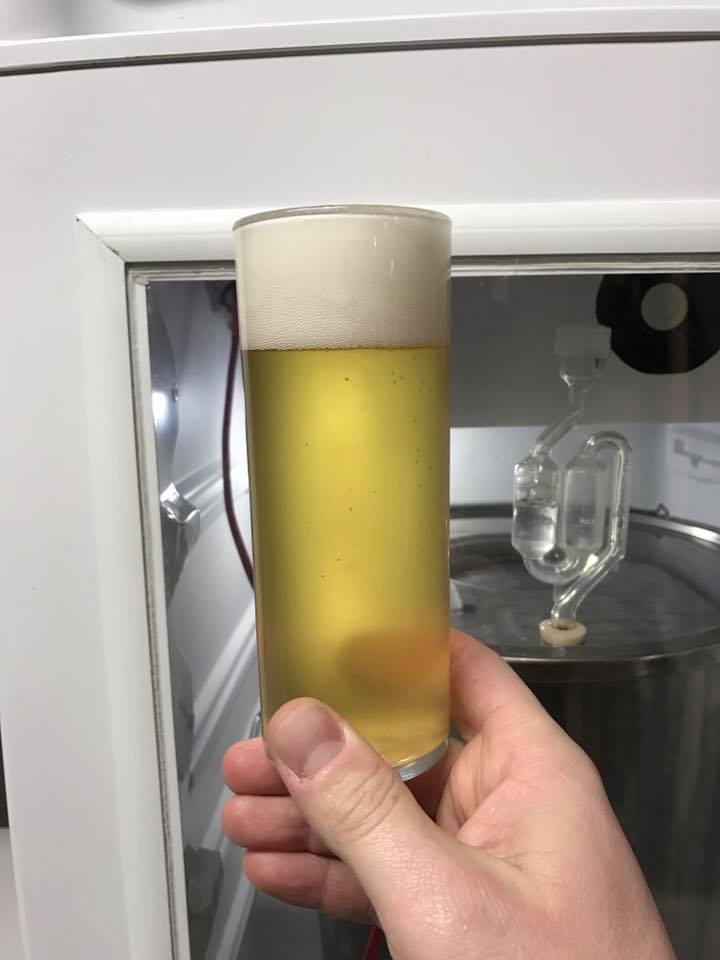

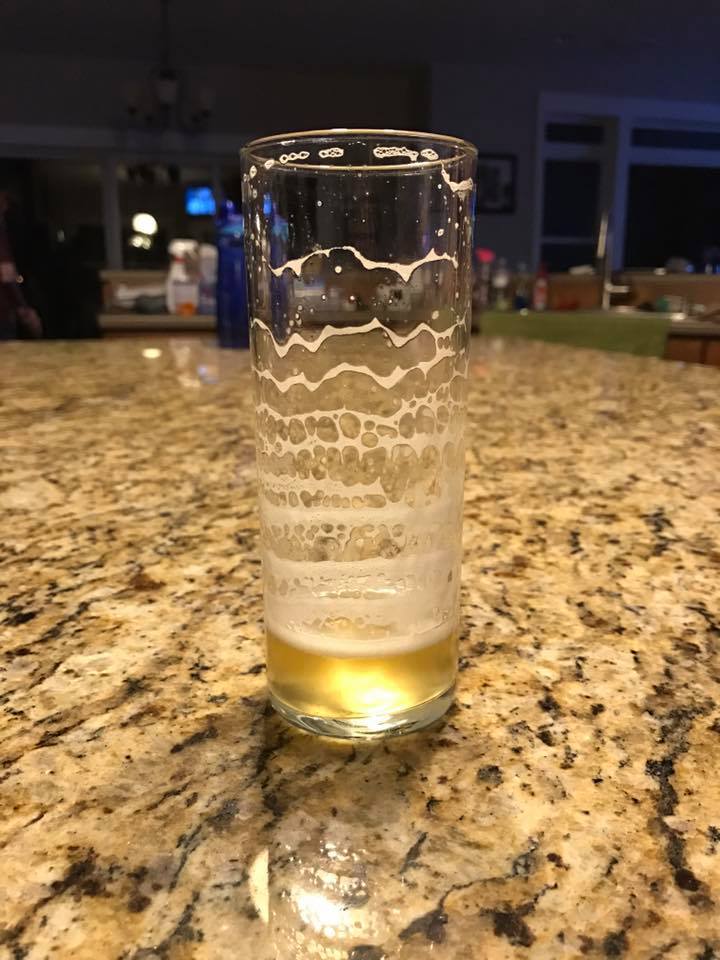
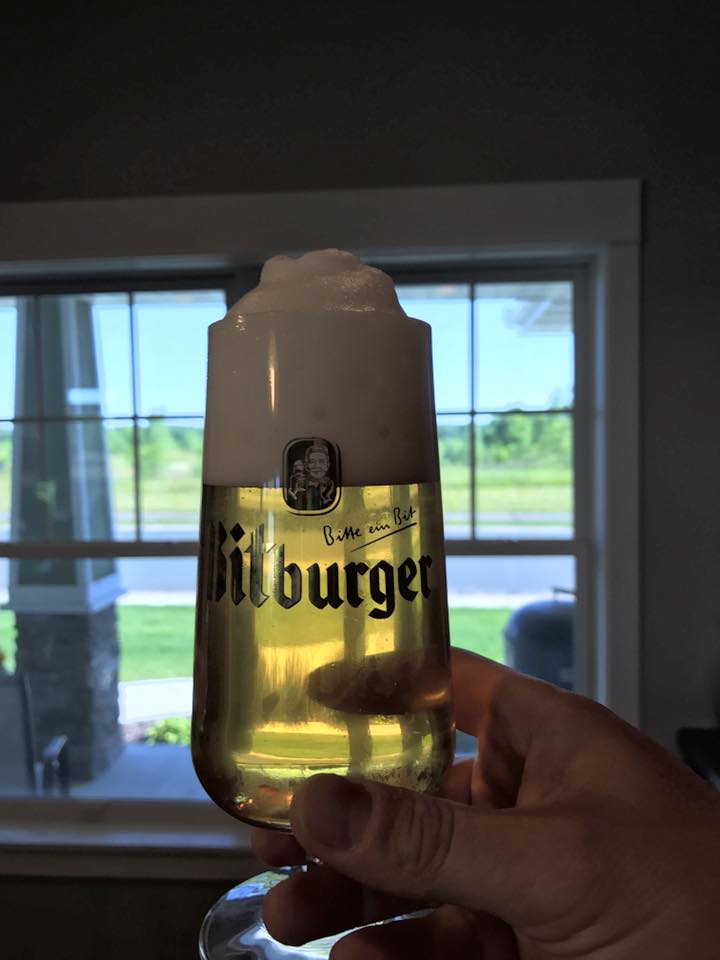
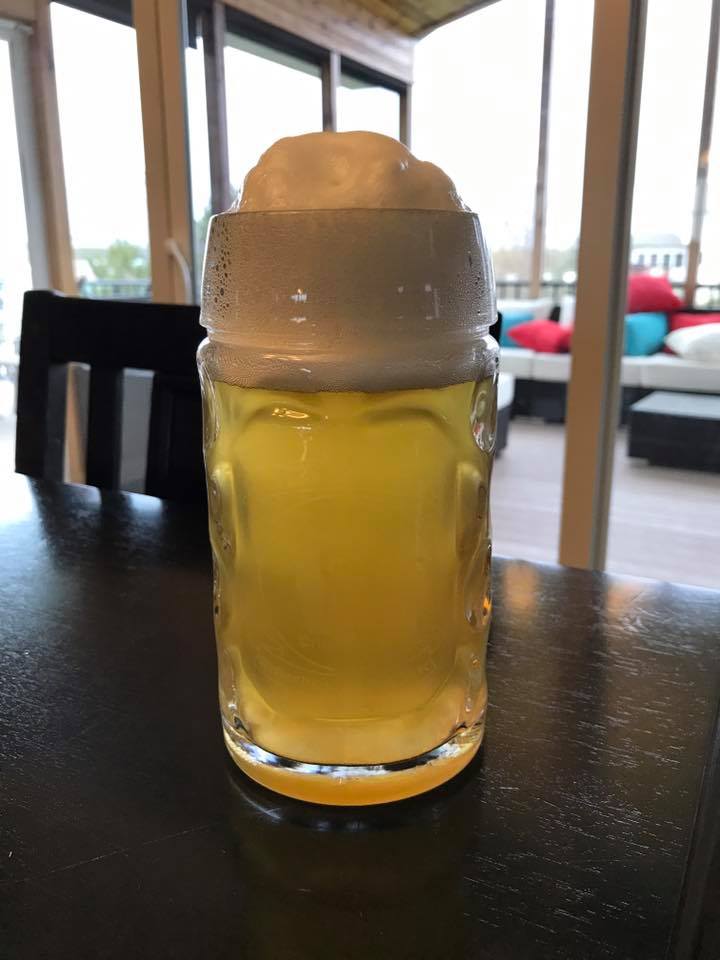
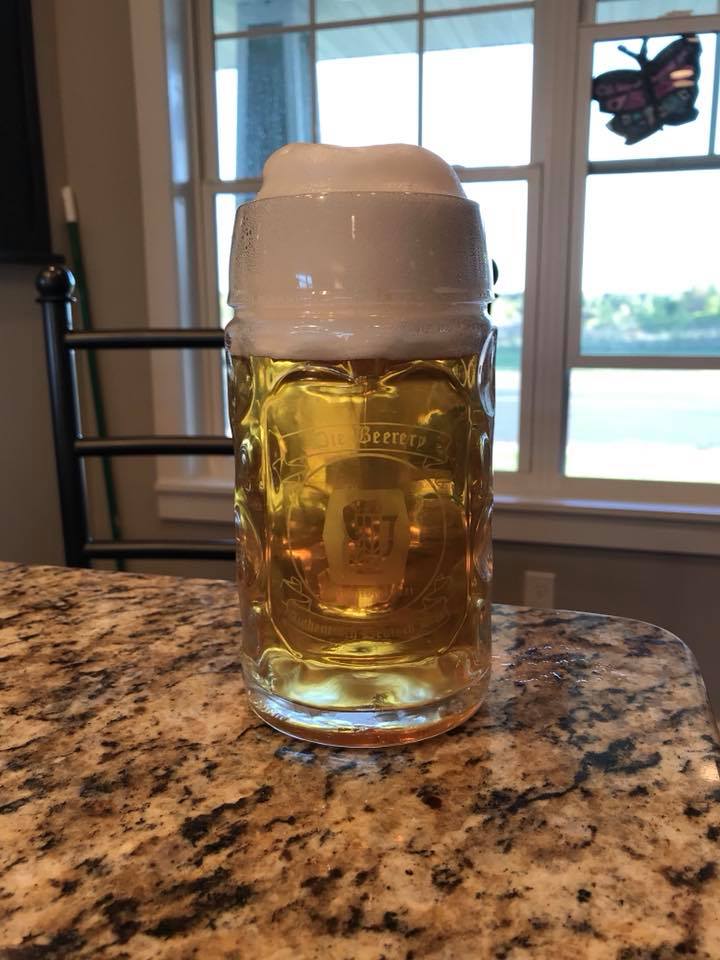
Here are some other examples of various beer styles:


May the foam be with you!